Test/Inspection
Test or Inspection conducted on a Material or Stock Item is recorded in this document. Upon creating of a Test Plan and association of the same with material/stock item, the Test/Inspection document can be started from the wizard.
Click the menu Production -> Documents -> Test/Inspection to view collection of already created documents.
Click + New button to start creating a new Test/Inspection document. It will start a wizard.
Select the Stock Item for which you plan to create the Test/Inspection. Only Stock Items associated with an existing Test Plan will appear in this wizard.
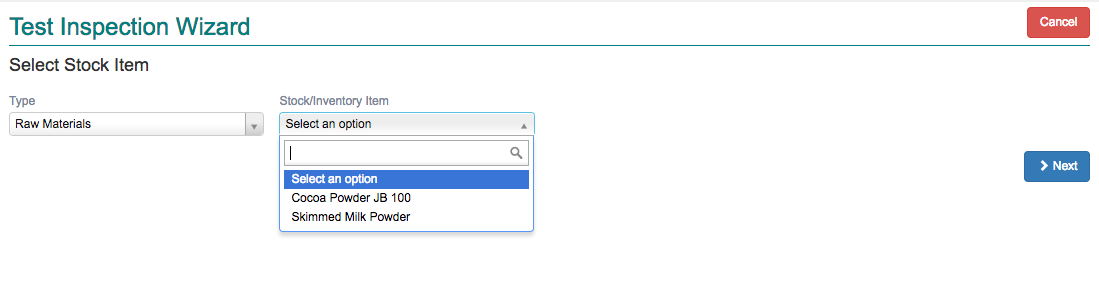
You may use the Stock Type to filter the list of stock items or directly select a stock item. Select the material and Click Next.
The document screen opens with the following:
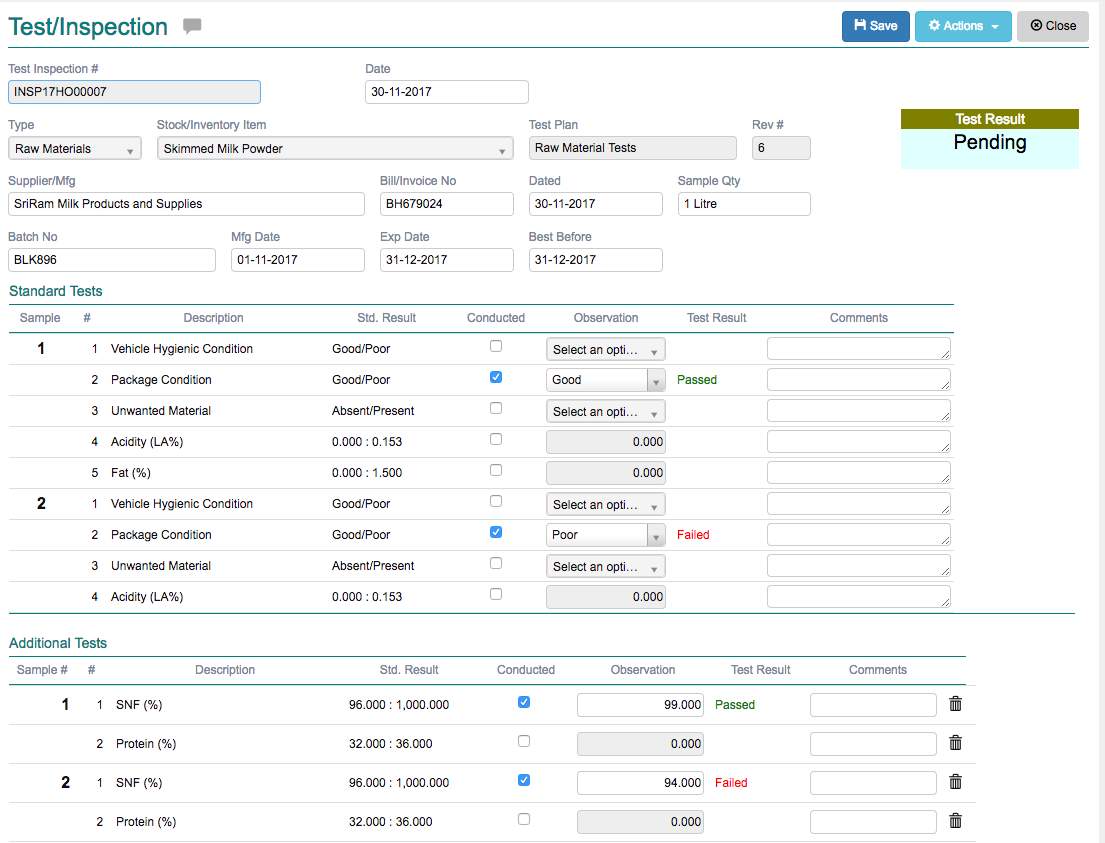
- Standard Tests All tests grouped together as standard test should be completed before the material/stock item is Accepted/Rejected
- Additional Tests Any of the additional tests can be selected by the user and applied to a material/stock item during Test/Inspection
The fields are explained in the following table:
| Field Name | Required | Description |
|---|---|---|
| Date | Yes | Document date |
| Supplier/Mfg | Yes | Name of Supplier/Manufacturer |
| Bill/Inv No | Yes | Bill/Invoice Number accompanying the material/stock shipment |
| Bill Date | Yes | Bill Date |
| Sample Qty | Yes | Sample quantity taken for testing |
| Standard Tests | ||
| Description | Read Only | Name of the individual test |
| Std. Result | Read Only | Range or Option defined in Test Plan |
| Conducted | Yes | Flag to inform that the test is conducted. Allows user to record observation/result |
| Observation | Yes | The result of the physical/chemical test conducted |
| Test Result | Read Only | Displays whether the test Passed or Failed |
| Comments | No | User/Tester can add small comments here |
| Additional Tests | Follows same rules as Standard Tests |
Complete the Standard Tests. If Additional tests are required, click on + Add and include additional tests. If you have collected more than one sample and would like to record test results of the second sample, click on + Add Sample. The standard and additional tests would be repeated for each sample added.
Refer to the Fields table to understand usage of various field types.
You can save the document intermittently without completing all the tests. However, to post and print a final copy all selected tests must be conducted and results recorded.
At the top right side of the screen you can see the final result of all tests.
If even one test fails, the Test Result would be Rejected.
If all tests were completed as Passed, the Test Result would be Approved.
If any of the selected tests are not completed, the test result would be Pending.
Save/Post the document if there are no further broken rules.
To print the document select Actions -> Print.